Install Application
The Huddo Analytics Application is provided as a .war file that is to be installed as a WebSphere Application in your Connections server environment. The application provides the Huddo Analytics engine, as well as the widgets for user interaction.
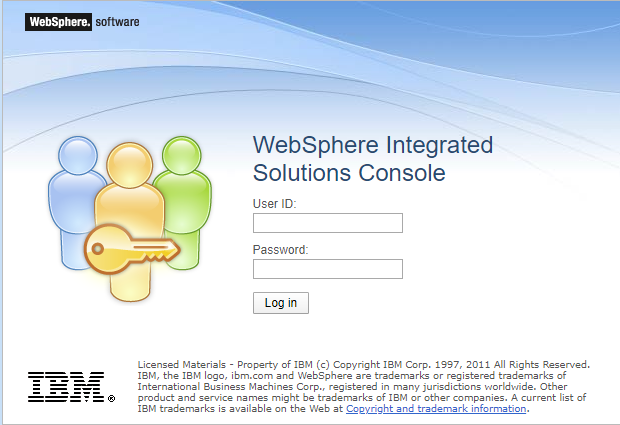
Login to the WebSphere Integrated Solution
Login to the WebSphere Integrated Solution Console for your Connections environment via a webbrowser.
Enter your administrator User ID and Password, then click the “Log in” button.
Install the Huddo.war file
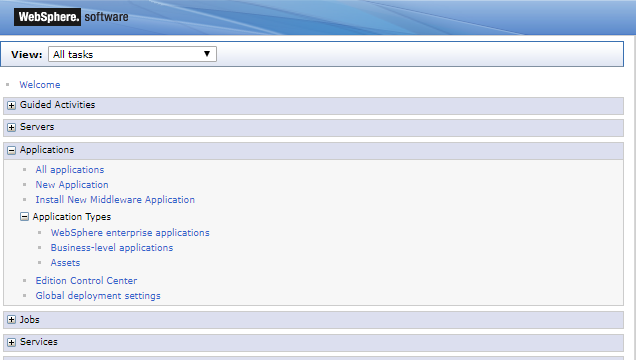
Navigate to Applications → Application Types → WebSphere enterprise applications
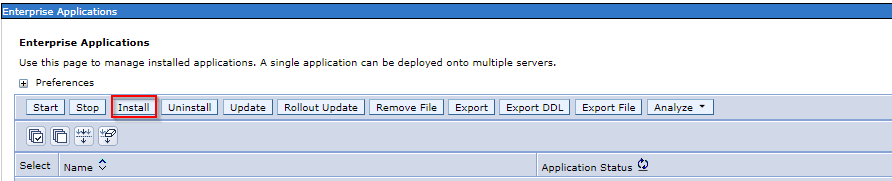
Click the Install button
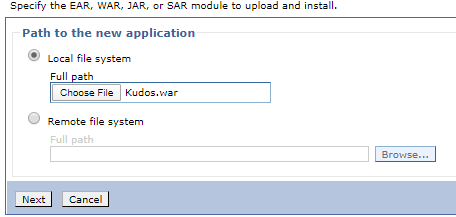
Browse the Local File System Path for the downloaded Huddo.war file then Click Next
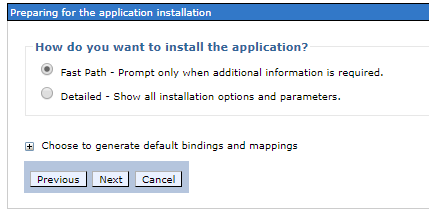
Check the Fast Path Option then Click Next
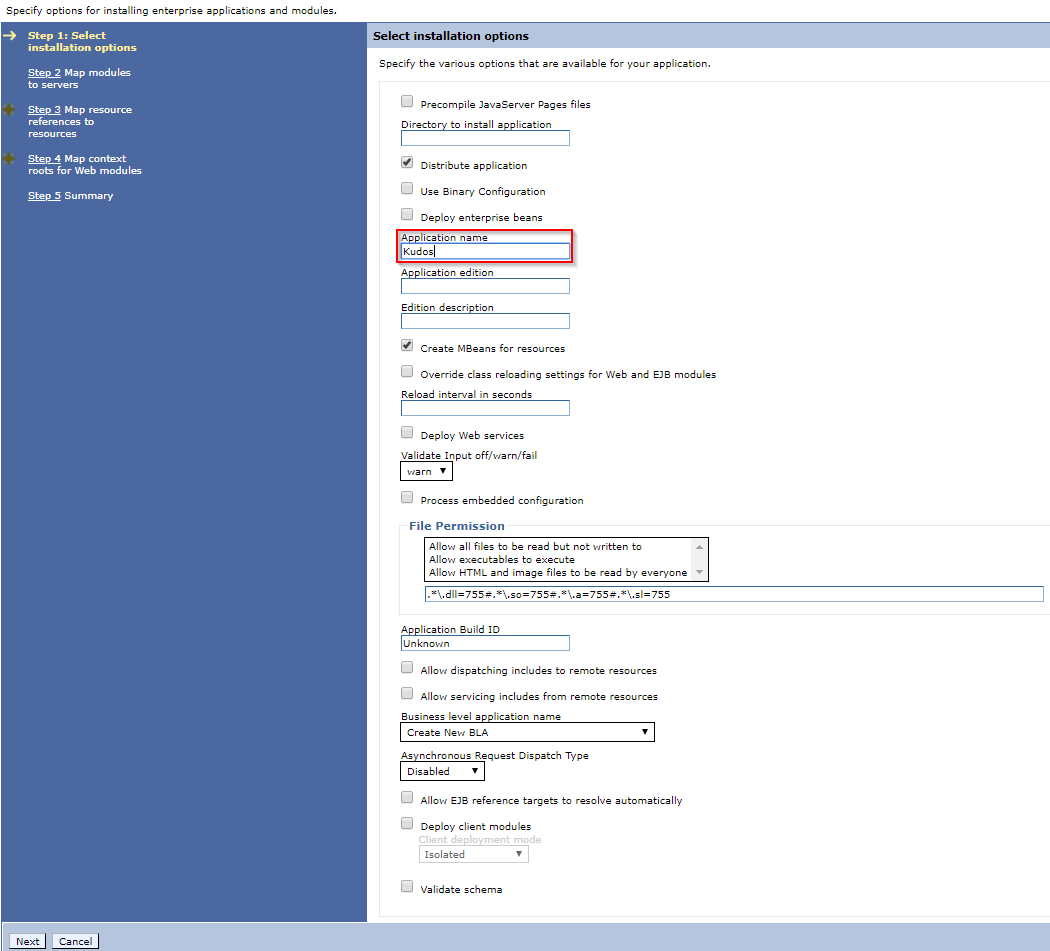
Change the Application name to Huddo then Click Next
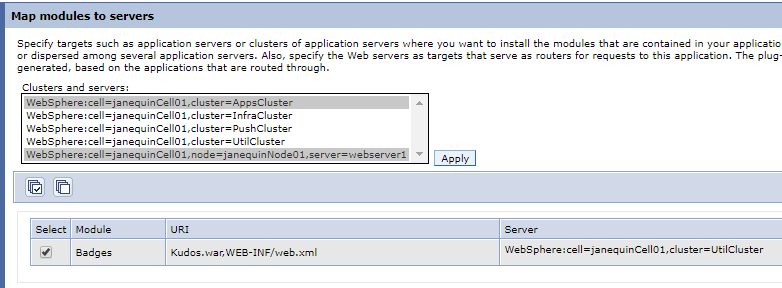
Highlight the Nodes for the Application, including the IHS Node. Select the Badges Module, click Apply then Next.
Please Note: It’s recommended that you create a separate cluster for Huddo if your Connections install is bigger than 10,000 users. You can do this via the ISC by clicking on Servers > Clusters > WebSphere application server clusters and then clicking New.
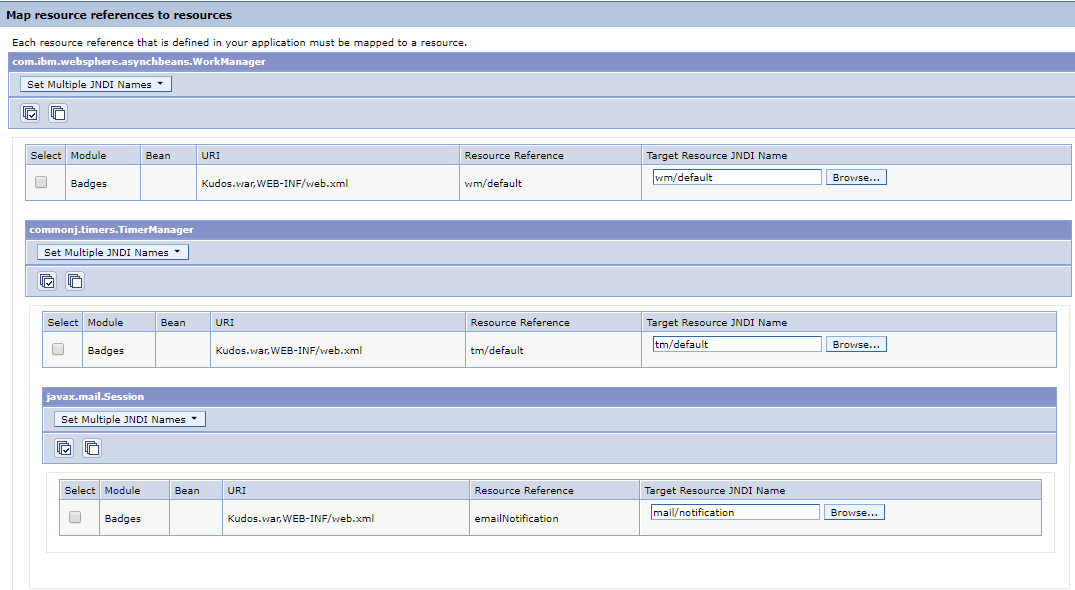
Click on Browse and map the default resources as shown. Click Next.
Enter Huddo as the Context Root, then click Next.
Please Note: The Huddo Installation guide assumes that the Context Root is set as ‘/Huddo’. If you set the Context Root to something other than ‘/Huddo’, then make sure that you replace ‘/Huddo’ with your Context Root when entering addresses.

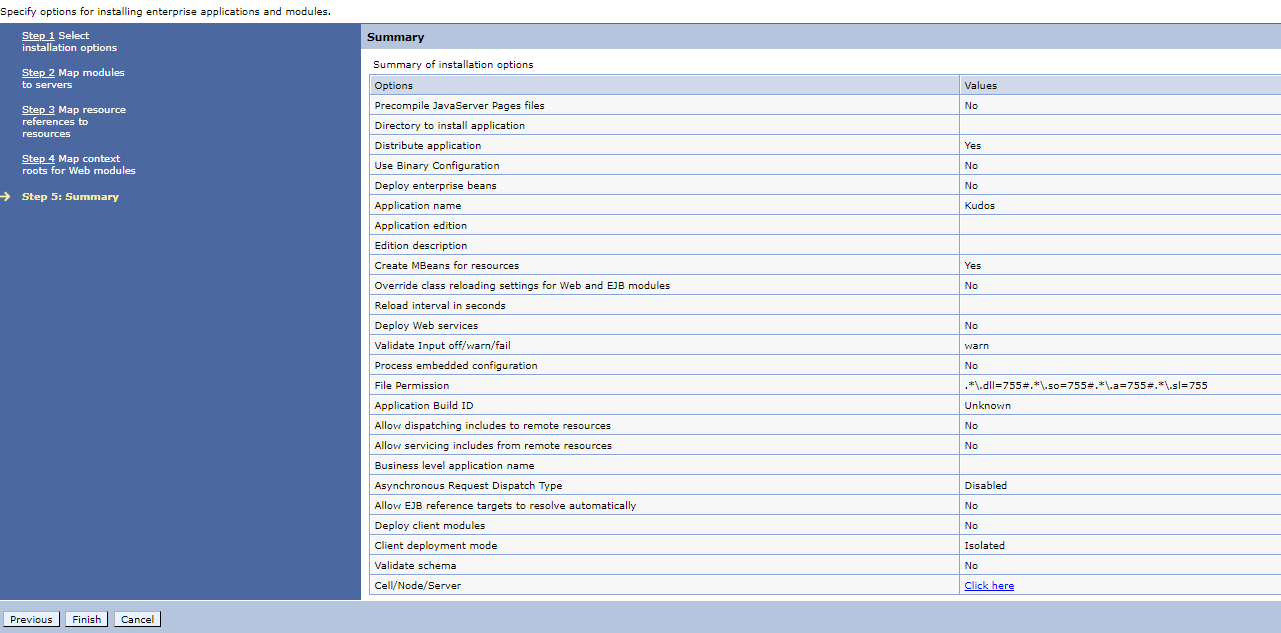
Review the Installation Summary. Click Finish.
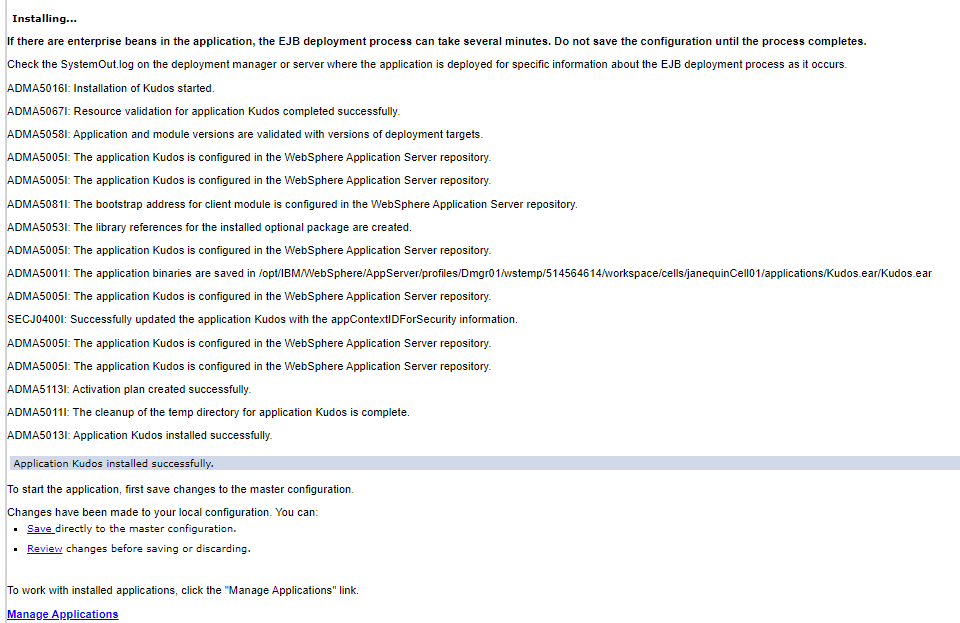
Review the Installation Results. Click Save.
Review the Synchronisation Summary. Click OK.
You have now successfully installed Huddo as a WebSphere Enterprise Application. Next, you will need to edit the security settings.
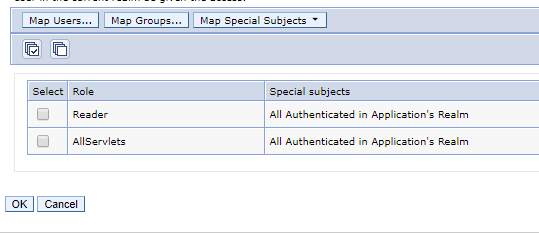
Modify the Huddo Application Security Role assignments
During this step, we will be defining the authenticated users/groups for each Security Role.
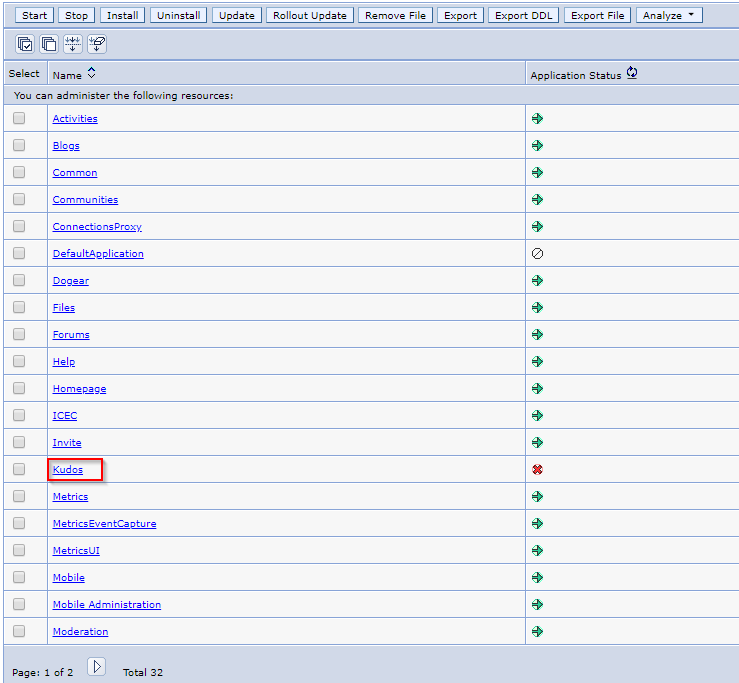
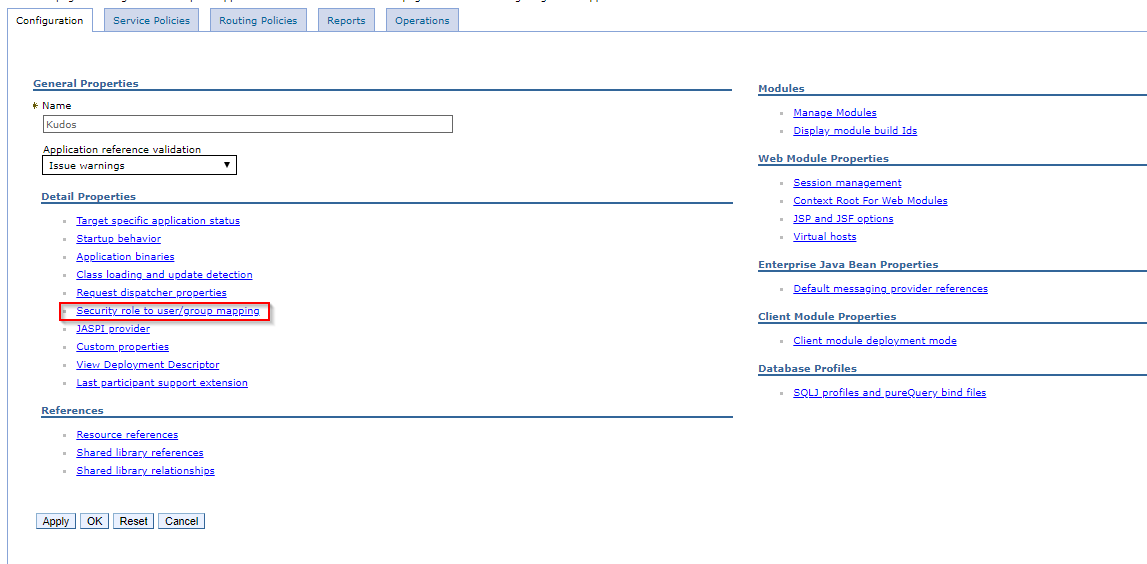
Find Huddo in the list of enterprise applications and click on Huddo to open the application configuration screen
Click Security role to user/group mapping
To ensure that only authorised users have access to Huddo and its data, modify the mapping of the AllServlets and Reader roles to the Special Subjects: All Authenticated in Application/Trusted Realm, then Click OK
Please note: You may set the Reader role to Everyone to grant read-only access to Huddo widget data to unauthenticated users.