![]()
Custom Fields in Huddo Boards
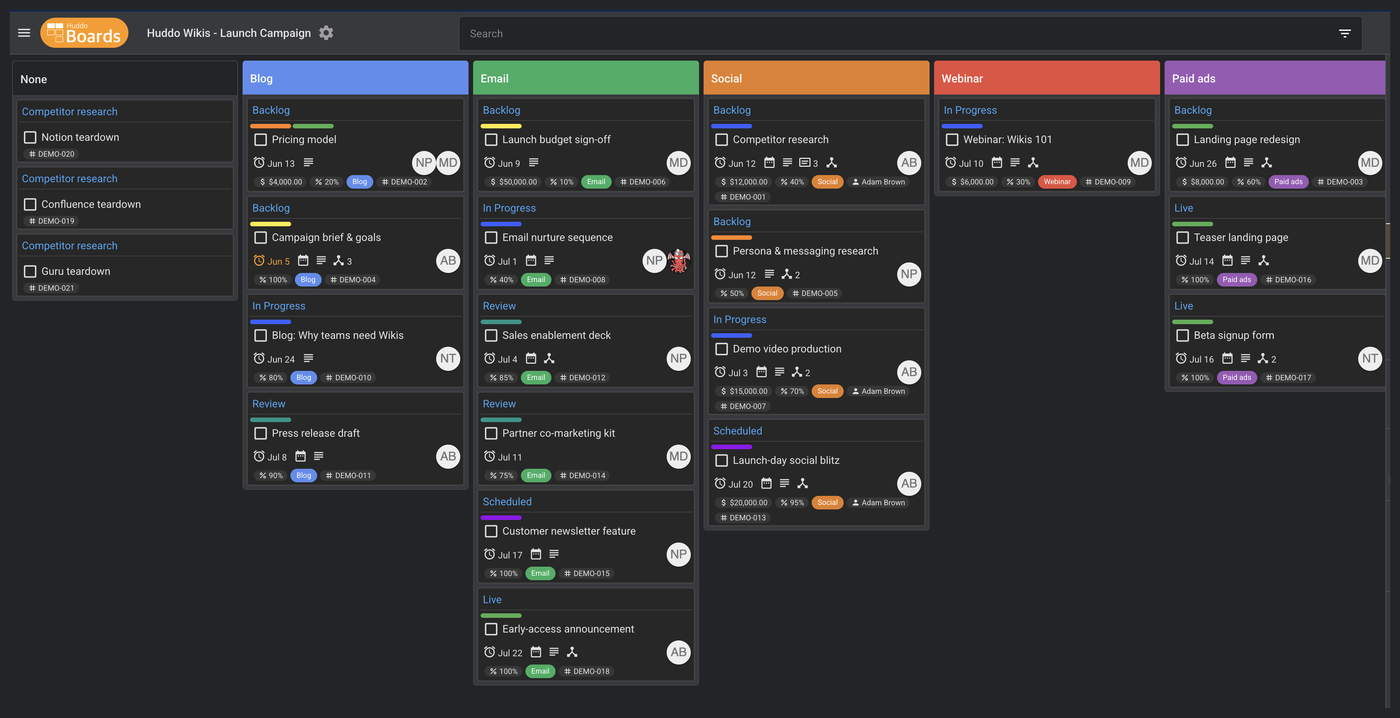
Every team tracks a little something extra. A budget. A priority. A ticket number, a client name, a percent-complete. Custom Fields let you capture exactly that information on your cards — and then sort, total, filter and group by it — so your board holds the whole picture, not just a title and a due date.
This guide walks you through creating custom fields, the field types on offer, and the handy ways to view your data once it's in there.

Where to find Custom Fields
Custom fields are defined per board, in the board settings.
- Open your board and click the settings (gear) icon next to the board name.
-
Select the Custom Fields tab.
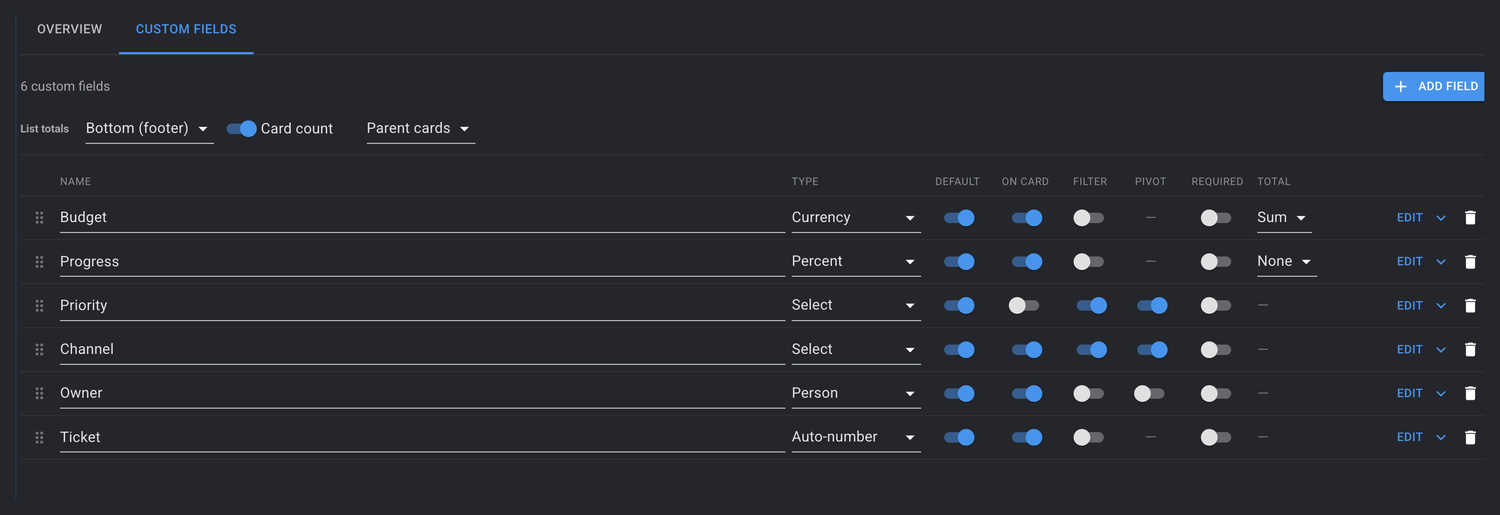
Here you'll see every field defined on the board, along with a row of switches that control how each field behaves. We'll cover those next.
Adding a field
- Click
Add field. - Give the field a clear name — for example Priority, Budget, or Ticket #.
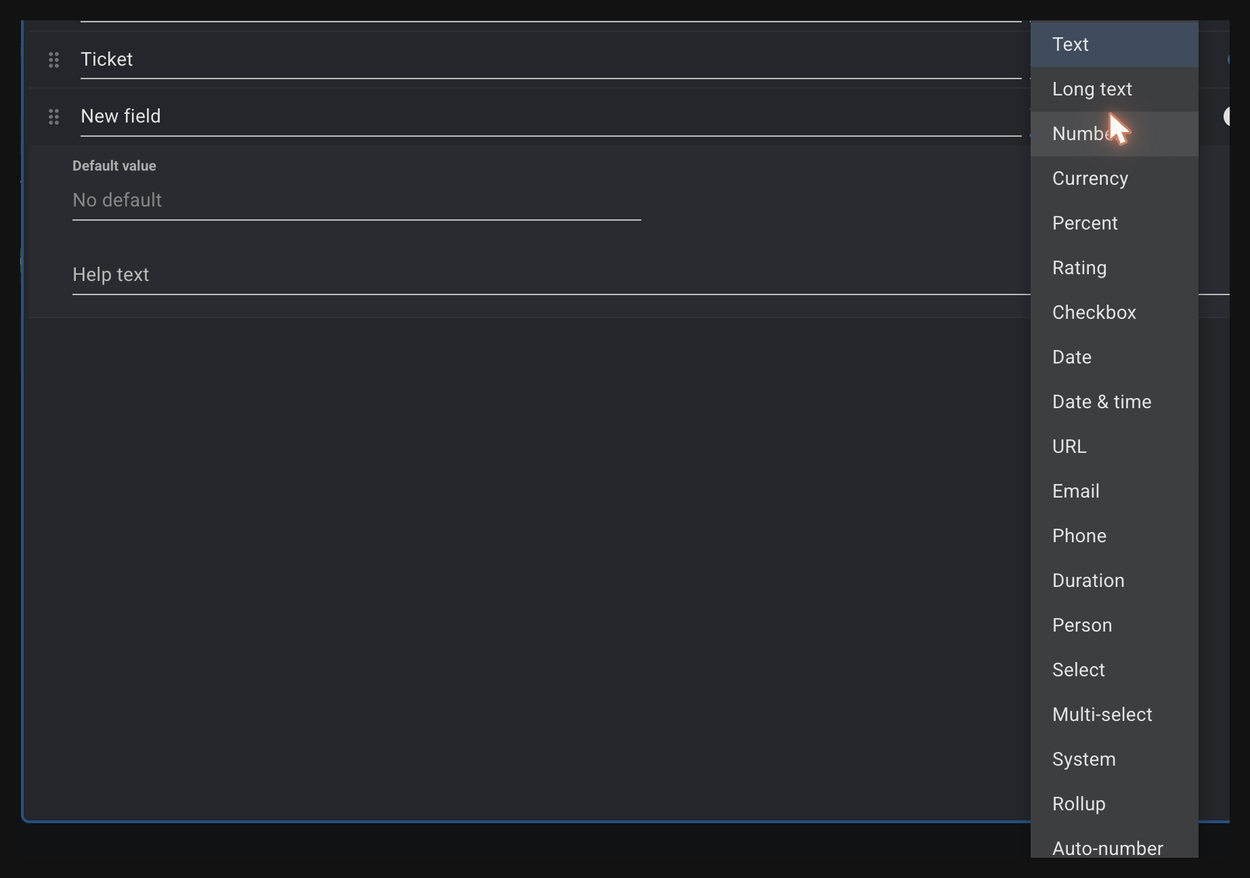
- Choose a Type from the dropdown (see Field types below).
-
Flip on any of the switches to control where and how the field appears.
Tip
Pick the type that matches your data. A Currency field formats nicely with a currency symbol, a Date field gives you a date picker, and a Select field keeps everyone choosing from the same tidy list of options. The right type makes the data easier to read and easier to total and filter later.
Field options
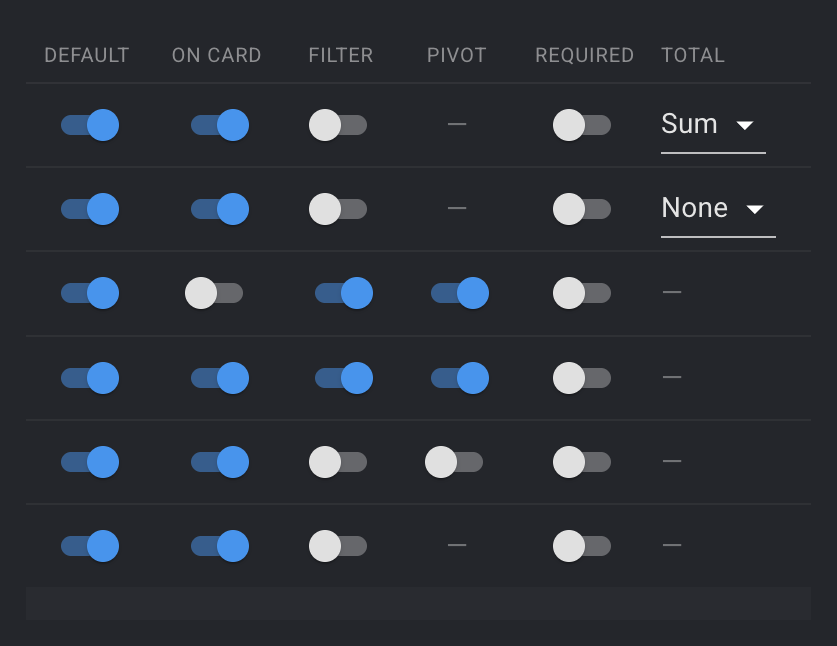
Each field has a set of switches:
| Option | What it does |
|---|---|
| Default | Adds the field to every card on the board, pre-filled with the field's default value. Great for information you want on every card. |
| On card | Shows the field's value as a small badge on the front of the card, so you can see it without opening the card. |
| Filter | Lets you filter the board by this field. |
| Pivot | Lets you regroup (pivot) the board by this field. |
| Required | Marks the field as required, prompting people to fill it in. |
| Total | Shows a total (sum, average or count) for the field at the foot of each list. Available for number-style fields. |
Field types
Huddo Boards offers a rich set of field types. You don't need a separate field for everything under the sun — just pick the one that best fits your data.
Text
| Type | Best for |
|---|---|
| Text | Short single-line text — a code, a name, a reference. |
| Long text | Multi-line notes and descriptions. |
| URL | Web links. |
| Email addresses. | |
| Phone | Phone numbers. |
Numbers
| Type | Best for |
|---|---|
| Number | Any plain number — quantities, scores, counts. |
| Currency | Money. Displays with a currency symbol (you choose the currency). |
| Percent | A 0–100 value, shown as a value, bar or ring. |
| Rating | A score out of a maximum you choose (e.g. 5 stars). |
| Duration | A length of time, shown neatly as hours and minutes. |
Dates
| Type | Best for |
|---|---|
| Date | A calendar date. |
| Date & time | A date together with a time of day. |
Choices
| Type | Best for |
|---|---|
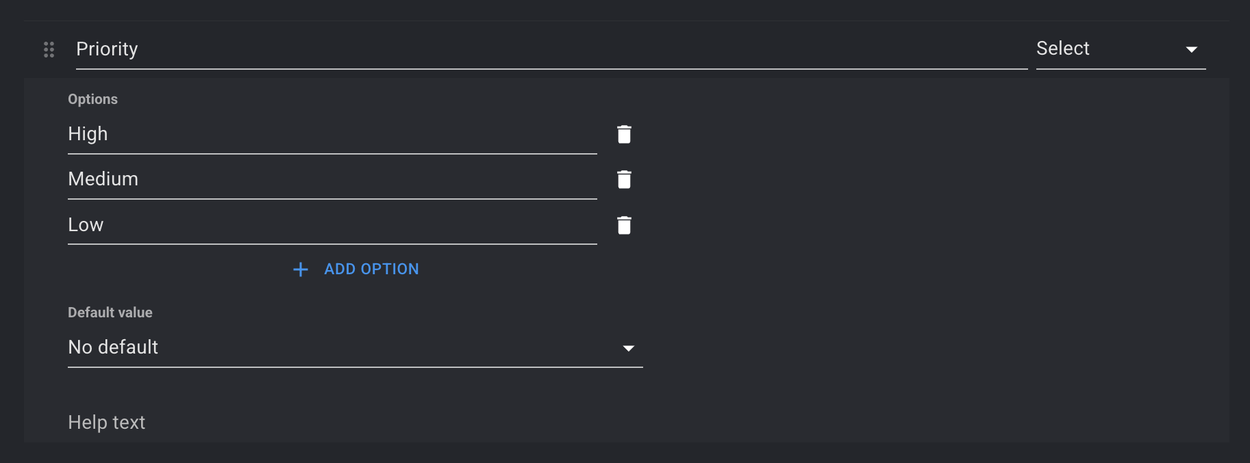
| Select | Choose one option from a list you define (e.g. Low / Medium / High). |
| Multi-select | Choose several options from your list. |
| Checkbox | A simple yes / no tick. |
For a Select or Multi-select field, click Edit to add your options. Use Add option for each choice you want to offer.
People
| Type | Best for |
|---|---|
| Person | Pick a person — handy for an owner, reviewer or point of contact. Their name is shown on the card. |
Automatic fields
These fields fill themselves in — you don't type their values.
| Type | Best for |
|---|---|
| Auto-number | Gives every card a unique, sequential number (e.g. WEB-0001). Perfect for ticket or reference numbers. See Auto-number below. |
| Rollup | Summarises a field across a card's sub-cards — for example, total the Budget of all sub-cards. See Rollups. |
| System | Shows built-in card information: Created date, Updated date, Created by or Updated by. |
Auto-number
An Auto-number field stamps each card with the next number in a sequence. It's ideal for ticket numbers, work-item IDs or any reference your team quotes.
After choosing the Auto-number type, click Edit on the field to set its format:
- Prefix — text placed in front of the number, e.g.
DEMO-. - Digits (zero-pad) — pads the number with leading zeros so they line up neatly. With 3 digits,
1becomes001.

So a prefix of DEMO- and 3 digits produces DEMO-001, DEMO-002, and so on. Numbers are assigned automatically and don't change — turn on On card to show them on the card front.
Rollups
A Rollup field rolls a number up from a card's sub-cards to the parent. For example, if each sub-task has a Budget, a rollup on the parent can show the total of those budgets — kept up to date automatically as the sub-cards change.
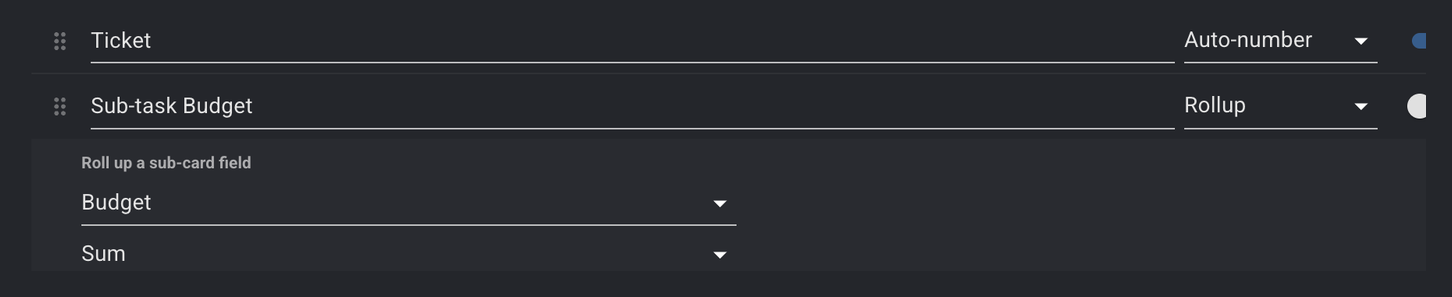
When you add a Rollup field, choose:
- the field to summarise (any number-style field on the board), and
- the aggregation: Sum, Average, Minimum, Maximum or Count.
Info
A rollup works across a card's sub-card tree, so it's most useful on boards where you break larger items down into smaller ones.
Seeing your data
Once your fields hold data, Huddo Boards gives you several ways to make sense of it.
On the card front
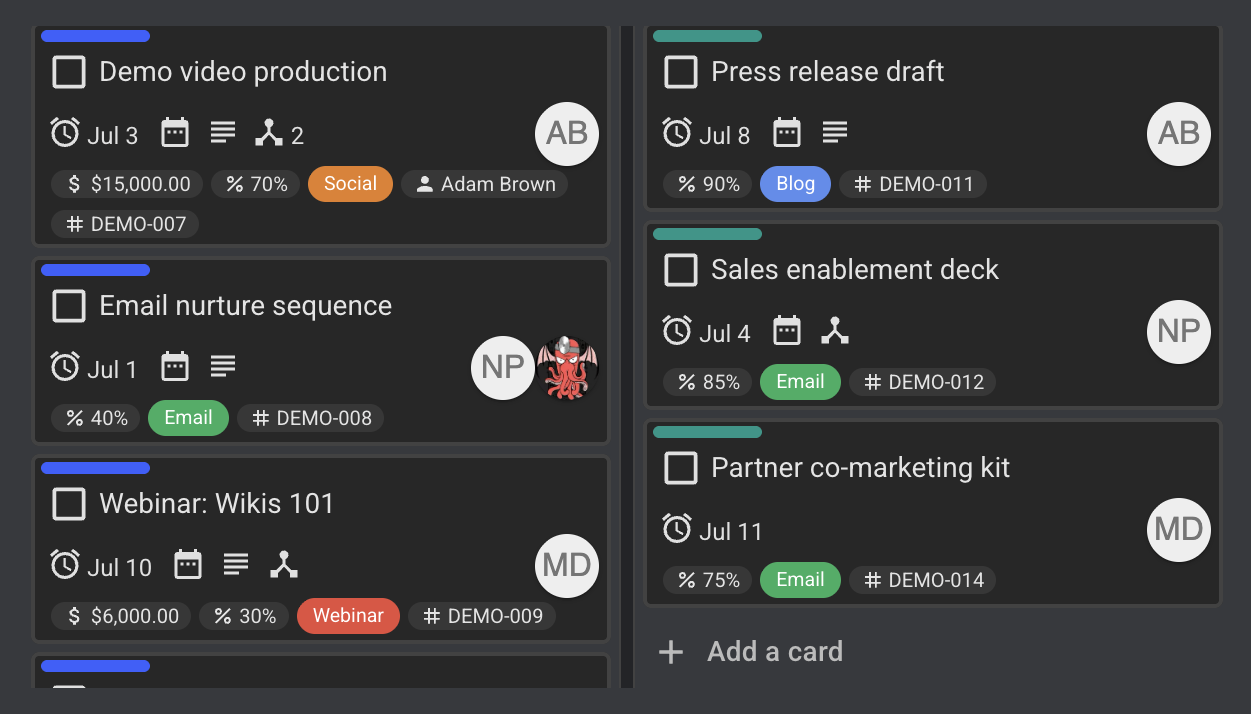
Turn on On card for a field and its value appears as a compact badge on the card — colours, ratings, currencies, people and more — so the key facts are visible at a glance.

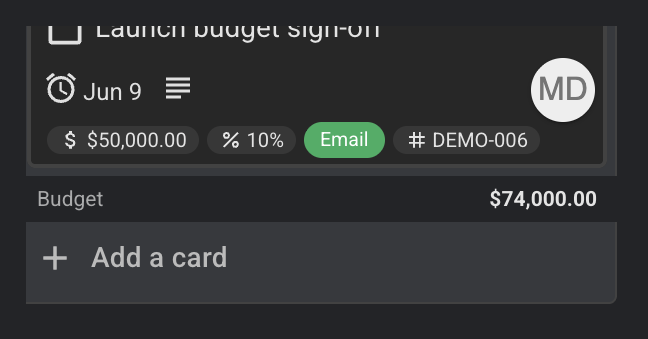
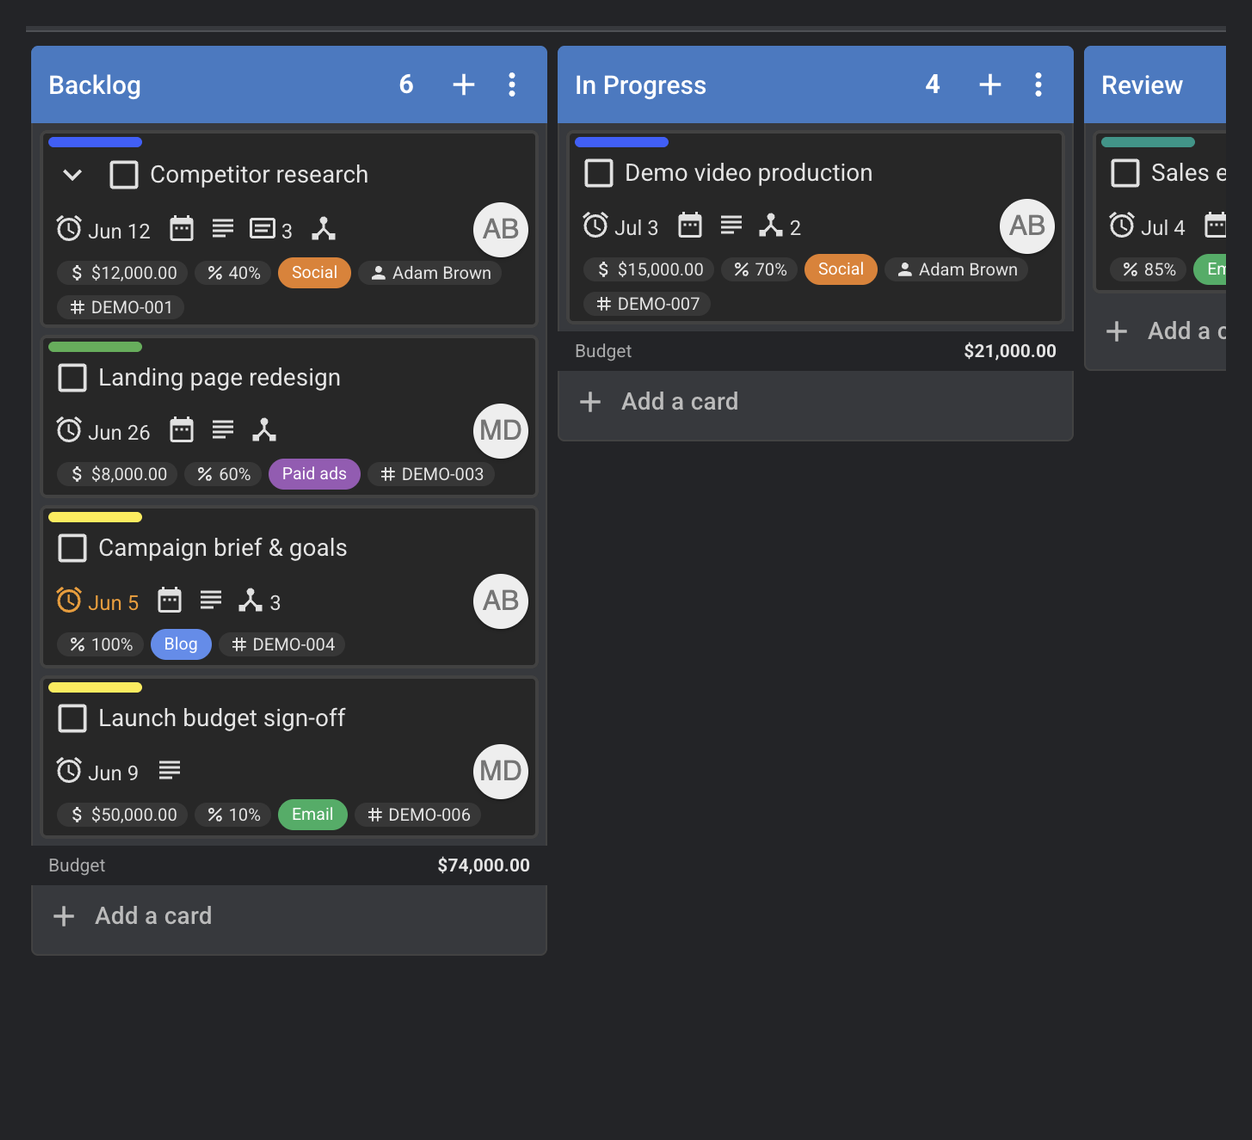
List totals
For number-style fields, turn on Total to show a running total at the foot of each list. You choose where totals sit using the List totals control (header or footer), and the totals update live as cards move.
Card count
The Card count toggle shows how many cards are in each list. Use the accompanying dropdown to count either:
- Parent cards — just the top-level cards, or
- All cards (incl. sub-cards) — every card beneath them too.

Filtering
Turn on Filter for a field and its values appear in the sidebar on the right-hand side of the board. Click a value to filter by it — here we've clicked High on the Priority field (the selected value is highlighted):

The board immediately narrows to show only the matching cards:
Pivoting
Turn on Pivot for a field and it becomes a view in the Board menu on the right-hand side. Select it to regroup the whole board by that field's values — see all your cards arranged by Channel, Priority or Owner instead of by list. It's a quick way to look at the same work from a different angle.
Editing, reordering and removing fields
- Edit — click
Editon any field to rename it, change its type, or adjust its options. - Reorder — drag the handle on the left of a field to change the order fields appear in.
- Remove — click the bin icon to delete a field.
Warning
Deleting a field removes its stored values from every card on the board, and can't be undone. If you only want to tidy up the card front, turn off On card instead of deleting the field.
Custom Fields turn a board from a simple task list into a place that holds all the detail your team needs. Start with one or two fields that matter most — a priority, an owner, a budget — and build from there. Have a question that isn't covered here? Contact us — we're happy to help.