
Create an Idea Lab
An idea lab poses one question to a group of people and collects their ideas and votes. The Create Idea Lab wizard takes you through six steps: the question, the theme, who can take part, how voting works, custom fields and automations, and a final summary. Anyone with a Huddo Ideas licence can create a lab, and you become its owner.
Start the Wizard
- Open Idea Labs
- Click
New Labat the top right, or the New Idea Lab card at the start of the list
To move to the next step, click Continue. To return to the previous step,
click Back. To jump back to an earlier step, click its number at the top.
Continue stays disabled until the current step is complete. If something is
missing, hover over the warning icon next to it to see what is missing.
1. Question
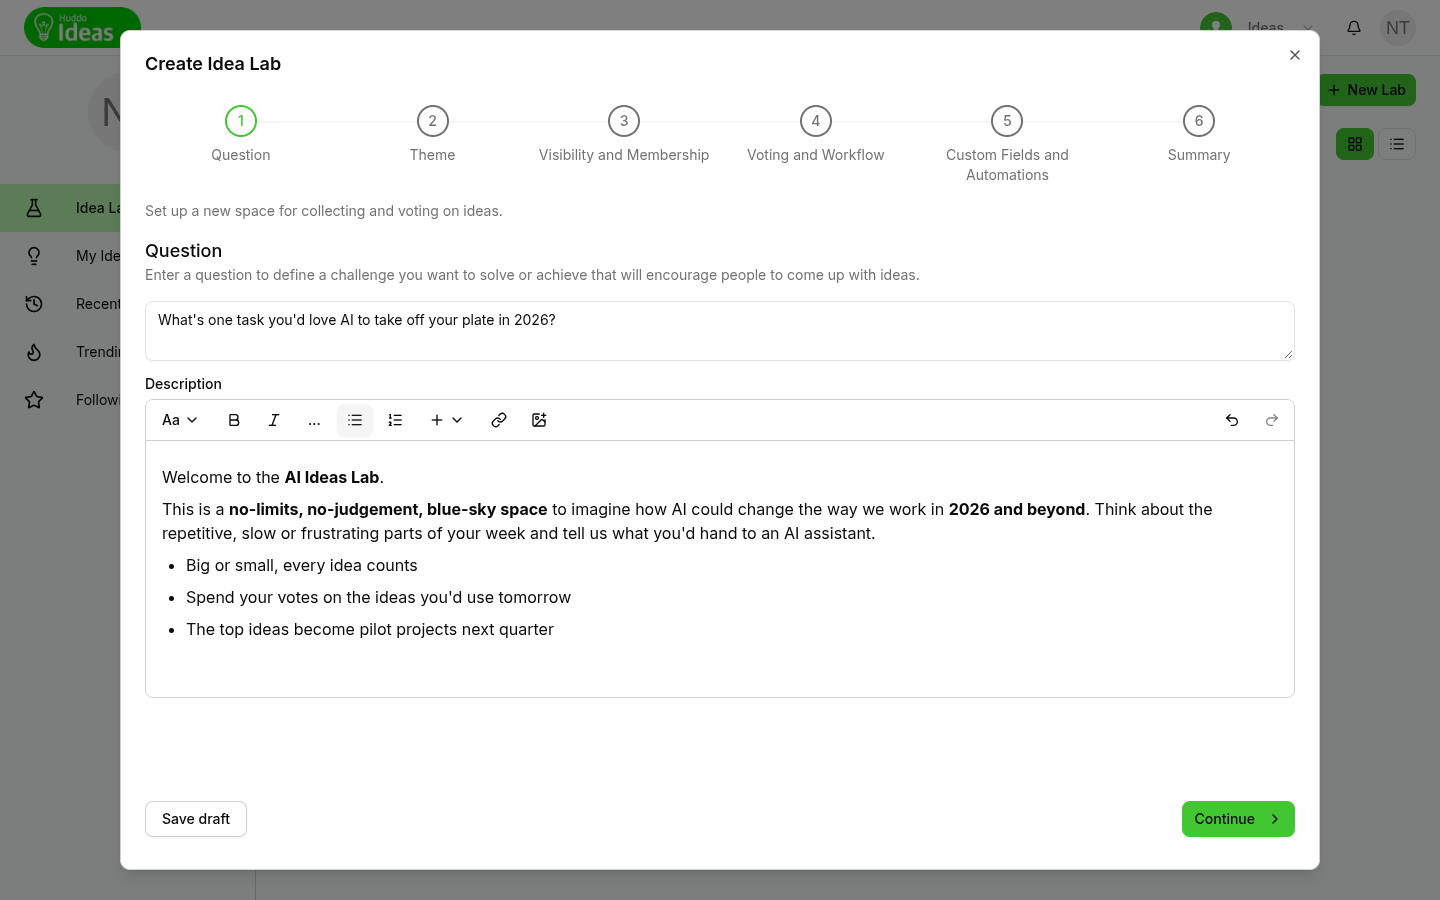
- Type the challenge or opportunity you want ideas for as a question. This is required, and it becomes the lab's title
- Optionally add a Description that explains the challenge in more detail. You can format the text and add images
- Click
Continue
2. Theme
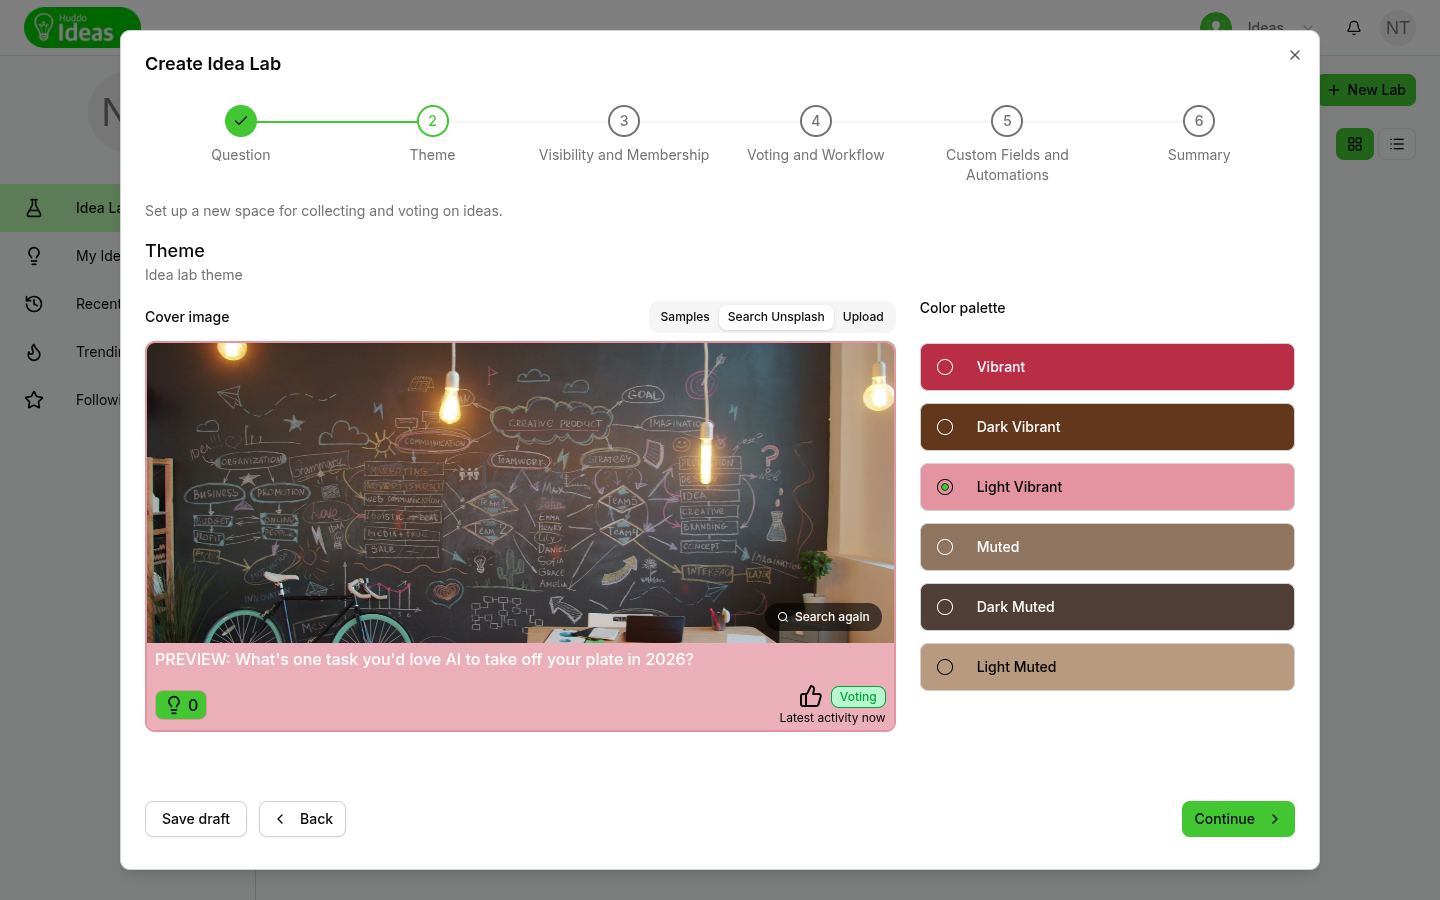
- Choose a Cover image from one of the tabs:
- Samples - scroll through the built-in images
- Search Unsplash - search for a photo. This tab only appears if your administrator has set up Unsplash
- Upload - drop in or choose an image of your own
- Pick a Colour palette. The swatches (such as Vibrant, Muted and Light Vibrant) are taken from your cover image
- Check the PREVIEW card to see how the lab will look in the list
- Click
Continue
3. Visibility and Membership
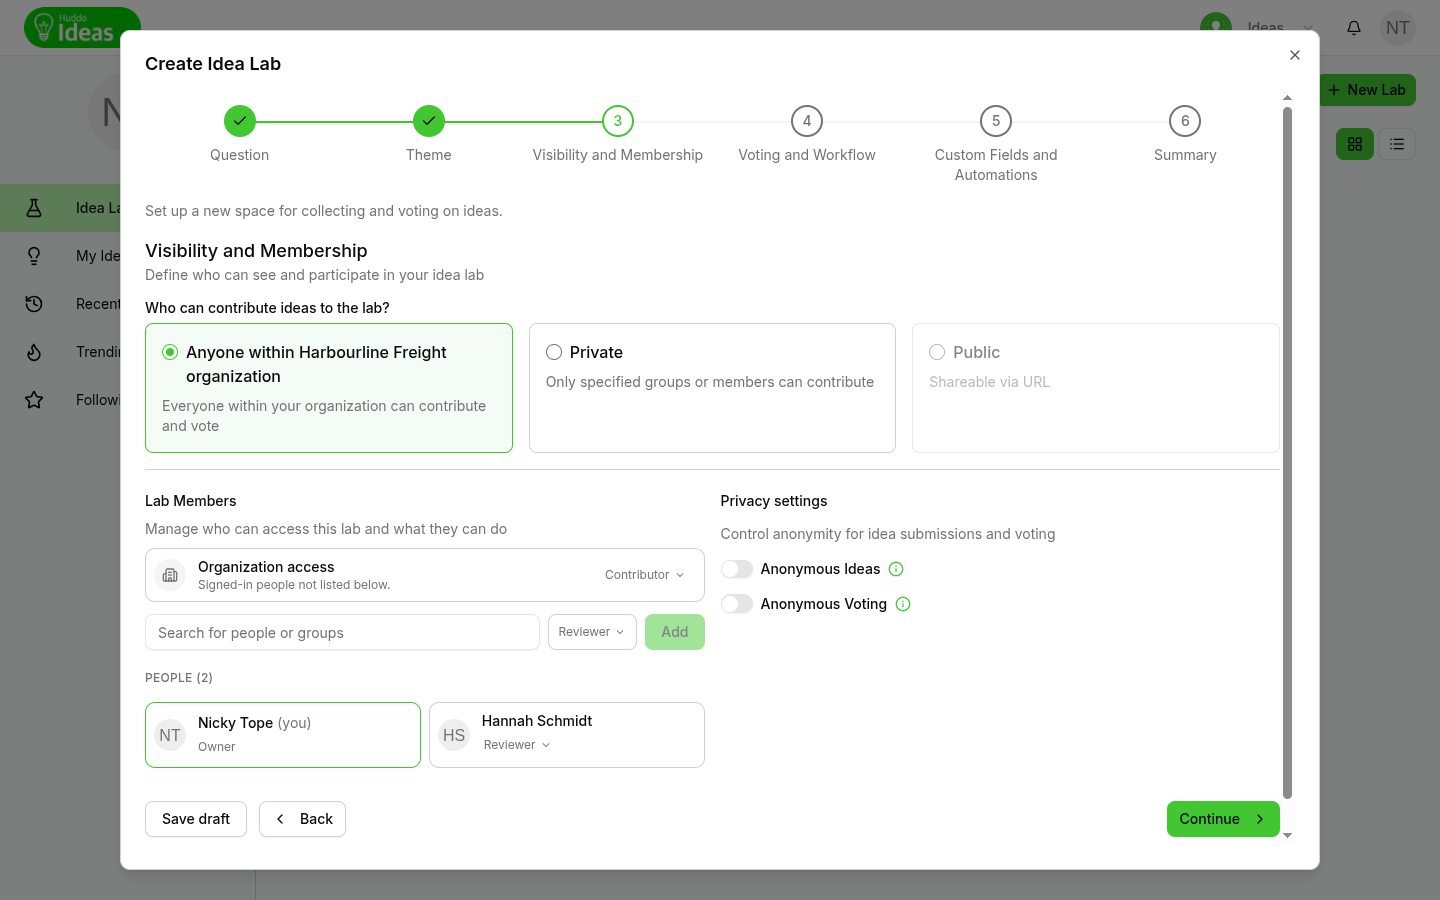
- Under Who can contribute ideas to the lab? choose:
- Anyone within (your organisation) organisation - everyone in your organisation can contribute and vote
- Private - only the people and groups you add can take part
- Public - not available yet. Public idea labs are coming soon
- If you belong to more than one organisation and chose the organisation option, pick the Organisation the lab belongs to
- Under Lab Members, add people or groups and choose their roles. See Members and Roles
- Under Privacy settings, switch on:
- Anonymous Ideas - hide who submitted each idea
- Anonymous Voting - hide who voted
- Click
Continue
Anonymous voting and vote justification
When you turn on Anonymous Voting, Vote Justification in the next step turns off. You can't turn it back on while voting is anonymous. See Voting and Workflow.
4. Voting and Workflow
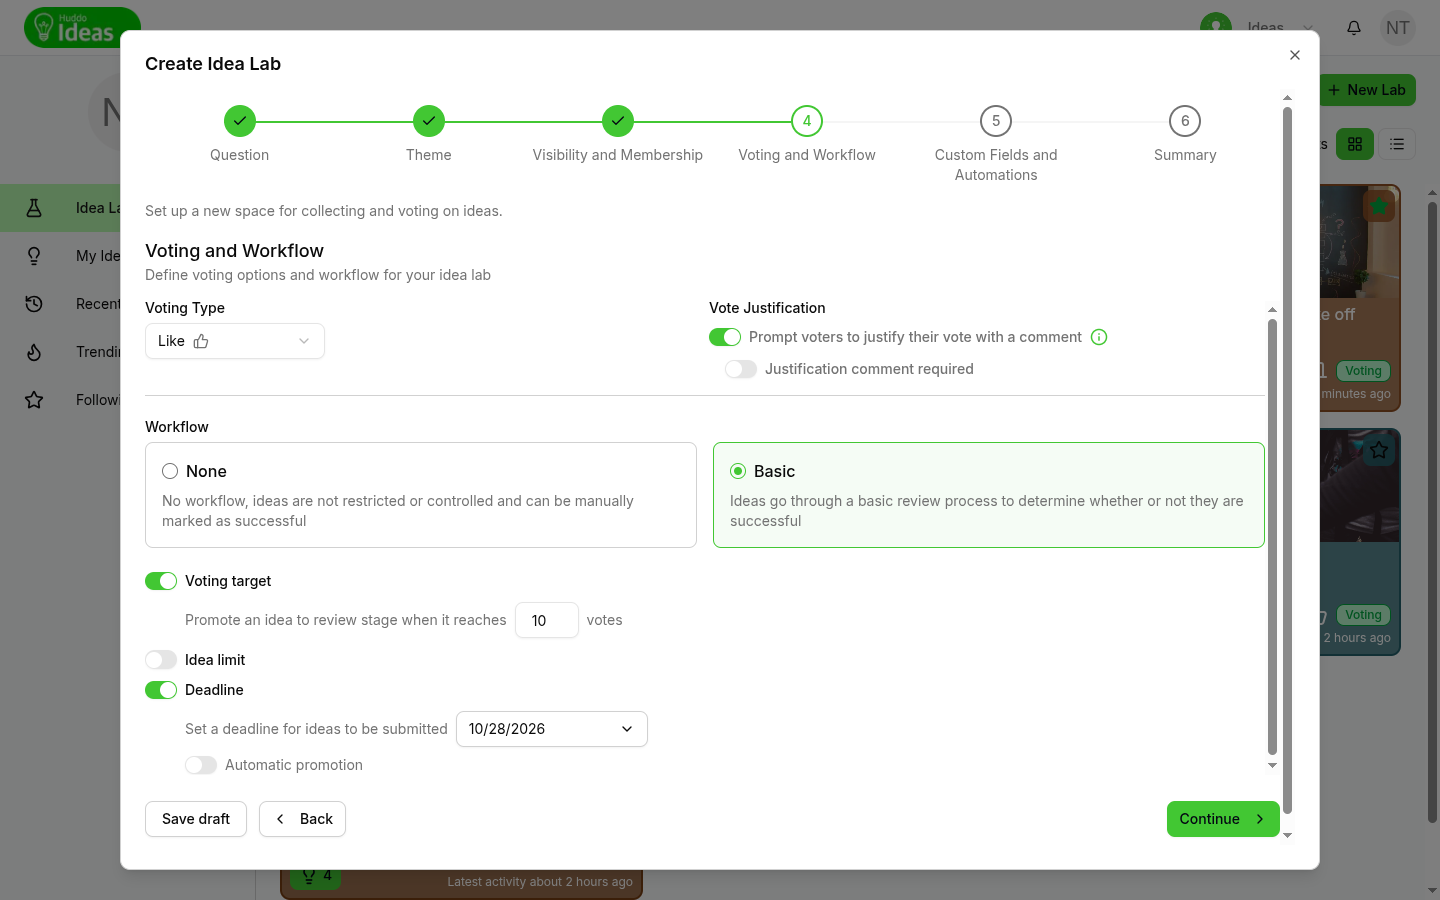
- Choose a Voting Type: Like, Like/Dislike or Voting Pool. If you choose Voting Pool, enter how many votes each voter is allocated (1 to 100)
- Decide whether to Prompt voters to justify their vote with a comment, and if so whether a Justification comment required
- Choose a Workflow:
- None - ideas aren't restricted, and you pick the successful ones yourself
- Basic - ideas go through a review process, with an optional voting target, idea limit and deadline
- Click
Continue
Every option is explained in Voting and Workflow.
5. Custom Fields and Automations
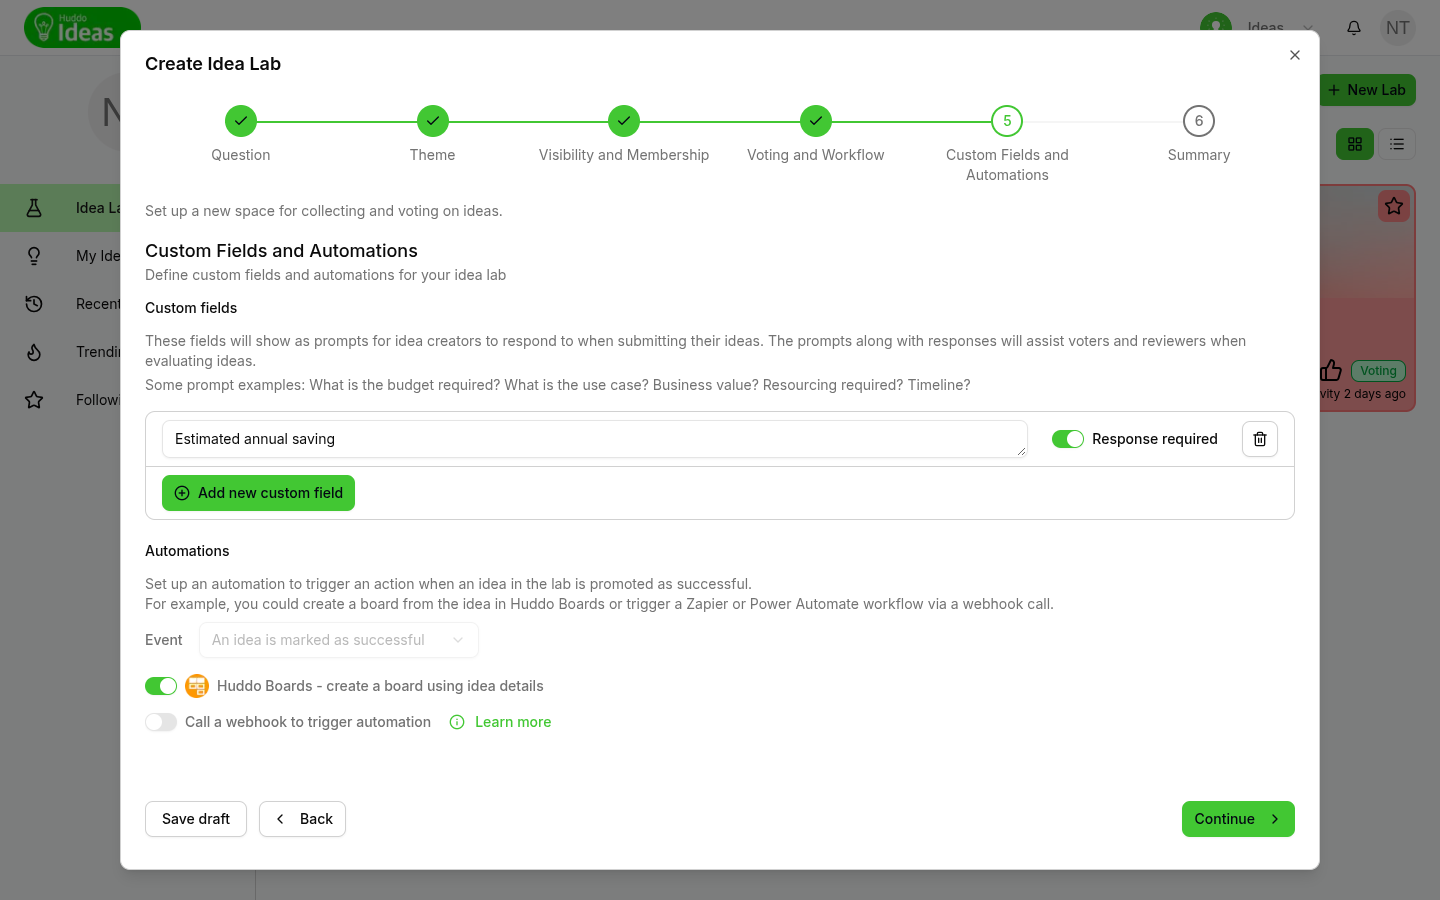
This step is optional.
- Custom fields - prompts that people answer when they submit an idea. Click
Add new custom field, then type the prompt. If everyone must answer it, switch on Response required. See Custom Fields - Automations - actions that run when an idea is marked as successful. Switch on Huddo Boards - create a board using idea details, Call a webhook to trigger automation, or both. A webhook also needs a Webhook URL. See Automations
6. Summary
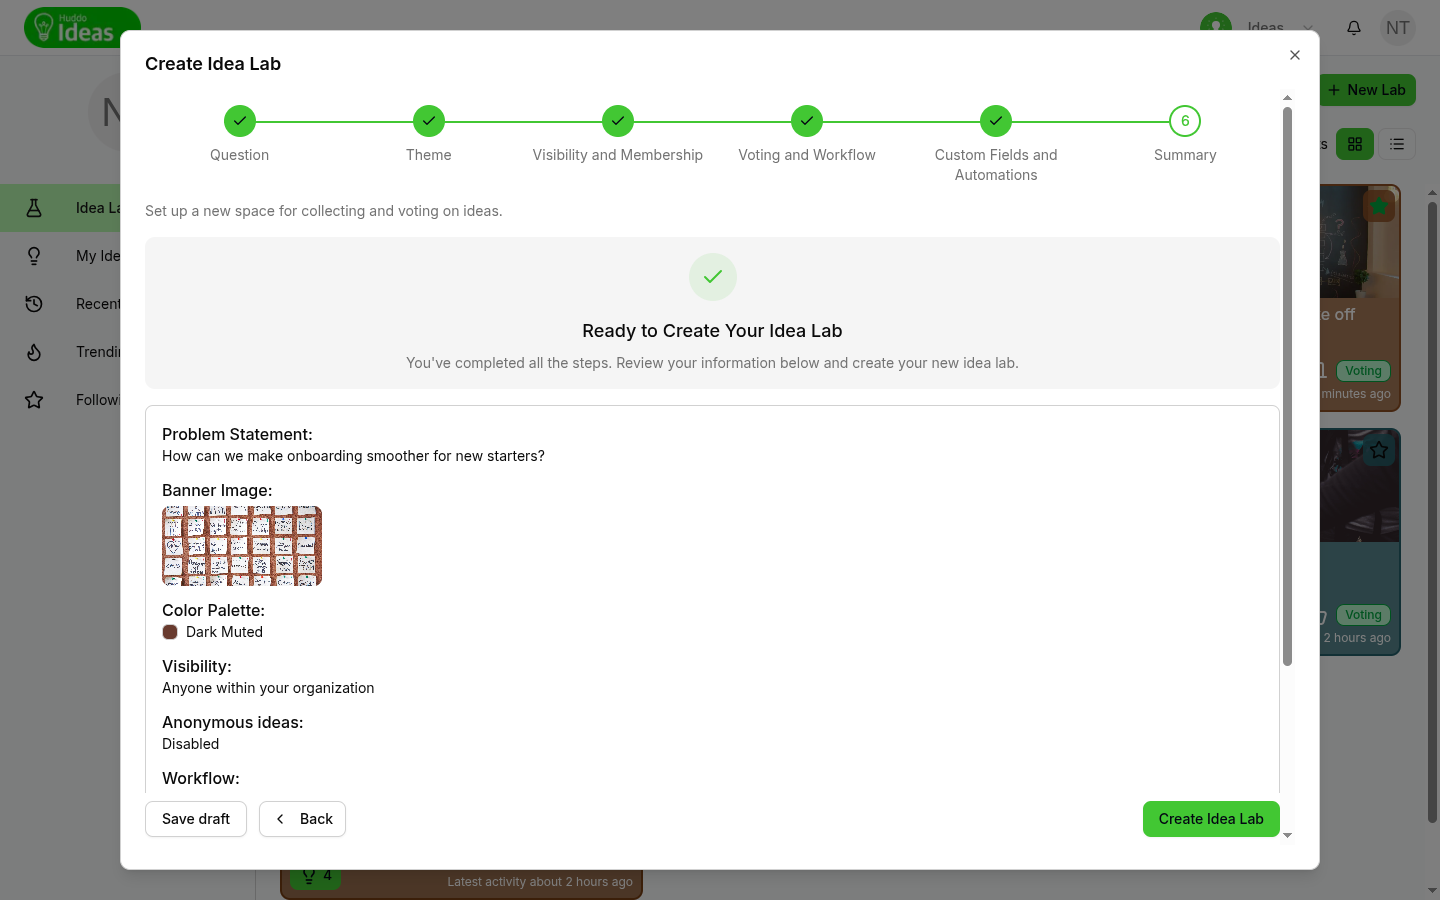
Check the summary of your choices. To change anything, click its step at the
top. When you are ready, click Create Idea Lab. Your new lab opens straight away.
Drafts
You don't have to finish a lab in one go. As soon as you enter a question, the
wizard saves your lab as a draft. It saves the draft again each time you move
between steps or close the wizard. To save and close straight away, click
Save draft.
Your drafts appear at the start of Idea Labs, marked Draft with the step you reached. Only you can see them.
- Click
Continueon a draft to pick up where you left off - Click the bin icon to discard it, then confirm with
Delete - Untick Show drafts above the list to hide them
Edit Lab Details
Lab owners can change a lab after it's created:
- Open the lab
- Click the gear icon (Edit lab details)
- Move through the steps with
Next - To save, click
Update Labon any step
On the Visibility and Membership step, click Manage lab members to change
who has access.
Completed labs
After a lab is completed, nobody can edit its details.
Delete a Lab
- Open the lab
- Click the gear icon (Edit lab details)
- Click
Delete Lab - Confirm with
Delete
Deleting a lab is permanent
Deleting a lab permanently removes the lab and all of its ideas, votes, comments and attachments. It can't be undone.
Please contact us if you have any questions.